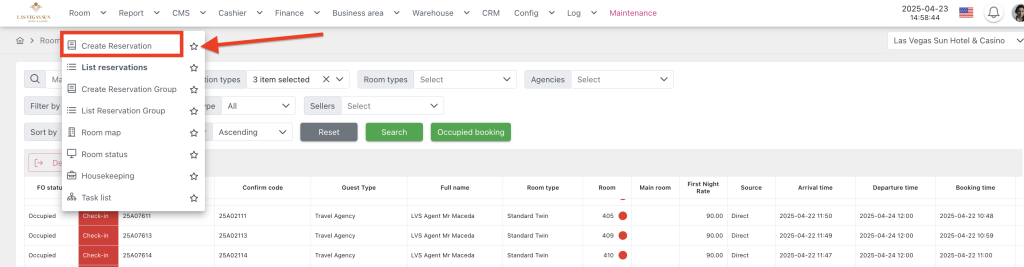
Create a new personal reservation
Navigation: Room > Create Reservation
This reservation form is used to capture customer information and booking details for a seamless check-in process. Below is a step-by-step guide on how to fill out the form:
- Register Information Section:
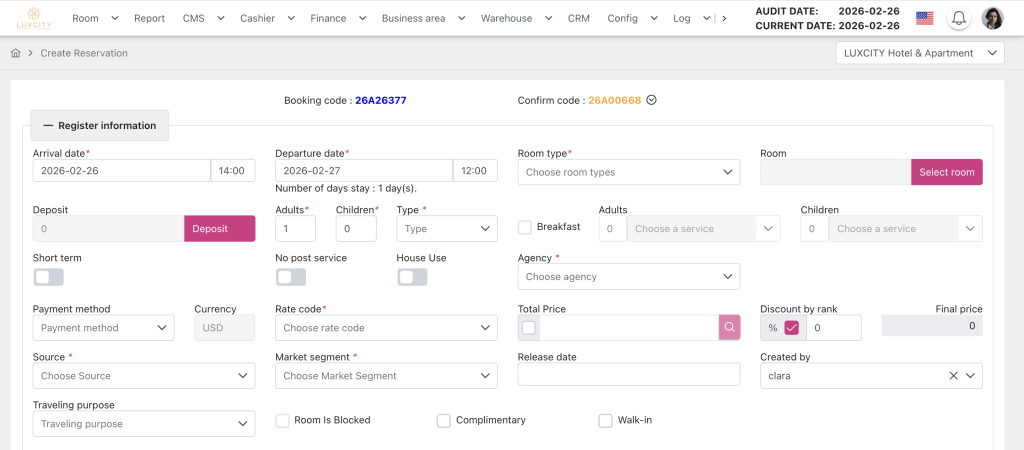
- Booking Code: This is automatically generated and will be used to identify the booking.
- Confirm Code: This is also generated and will serve as the confirmation code for the guest.
- Arrival Date: Select the guest’s arrival date. This will determine the booking start date.
- Departure Date: Select the departure date for the guest. This will be the end date of the booking.
- Number of Days Stay: Automatically calculated based on the arrival and departure dates.
- Room Type: Choose the room type for the booking.
- Room: Select Room for the booking, optional.
- Deposit: Enter the deposit amount if any.
- Adult: The number of adults in booking.
- Children: The number of children in booking.
- Type: Select the reservation type of group booking, including Definite, Tentative, Waiting.
- Breakfast: Select if breakfast is included, and specify the number of guests as well as the breakfast code applied.
- Short Term: By default the booking is for a short-term stay, when switching the button, change to long-term stay.
- No post service: By default, it’s turned off. When turning on, user cannot post service to the room (including FnB/Spa post to room).
- House used: Only display when there is room assigned to the booking, should reflect the reservation status House used of the room.
- Agency: Select the company/agency of guests.
- Payment Method: Choose the method of payment (credit card, cash, etc.), only require when having deposit or special services.
- Currency: By default, USD. Cannot editable.
- Rate Code: Choose the rate code applicable for this booking.
- Total Price: Automatically calculated based on room type, rates, and other services.
- Discount by rank: The discount can be applied either as a percentage or amount, and the maximum discount value depends on the value set for the agency.
- Final price: Display the rate price after discount.
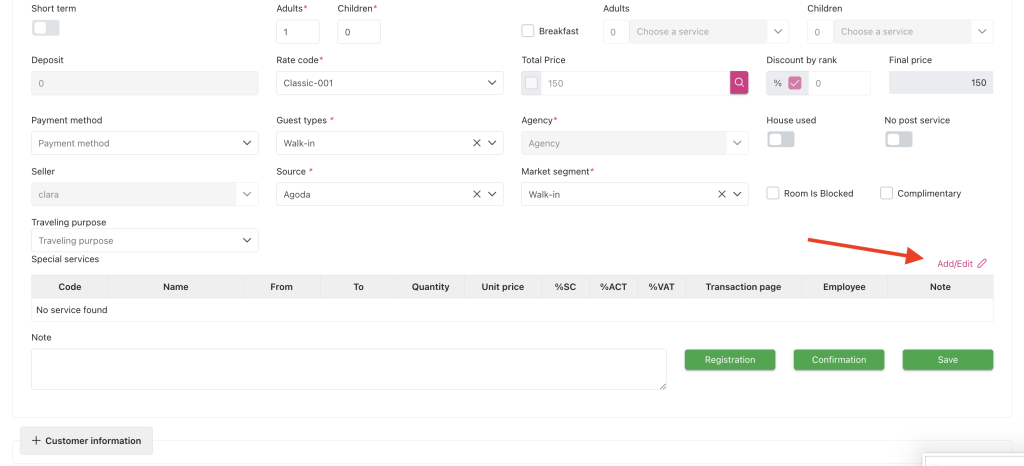
- Source: Select the source of the booking (e.g., direct, online agency, etc.).
- Market Segment: Select the market segment for this guest (e.g., corporate, leisure, etc.).
- Release Date: Enter the release date for the booking if applicable.
- Seller: Display the user that create the booking, default display the user login.
- Room Is Blocked: Default unchecked. When checking, cannot change the room and room type of booking.
- Complimentary: Default unchecked. When checking, rate price will set to 0.
2. Special Services: If any special services are required (e.g., additional services, amenities), they can be added here.
Step 1: At Special service section, click Add/ Edit to show pop up
Step 2:
- Scroll down/ search to select finding item in the left table
- Update information of each field in right table for selected item (1) > Add
- Then Add, the information of selected item will display in transaction list table, press to re-update information (2) or click trash icon to delete
- Cancel to exit, Save to complete
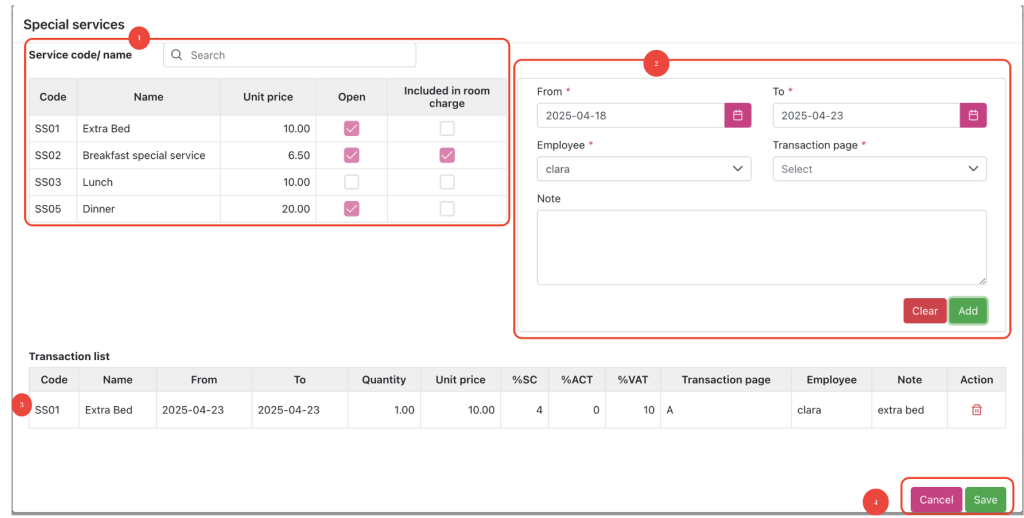
Result: After night audit, the transaction of special service will be displayed at folio tab
3. Customer Information Section:

- Full Name: Enter the full name of the guest.
- Phone Number: Enter the guest’s phone number.
- Email: Enter the guest’s email address.
- Gender: Select the guest’s gender.
- ID Card / Passport Information: Enter the guest’s identification details such as ID card number, passport number, and expiration dates.
- Nationality: Choose the nationality of the guest.
- Job: Optionally, enter the guest’s job title.
- Fax: Optionally, enter the fax number.
- Visa and Visa Expiry: Enter the guest’s visa details and expiry date if applicable.
- Membership Card Number & Tier: Enter the membership card number and tier if the guest has one.
- Child: Check if the guest is a child, if applicable.
- Customer type: select the customer type
- Add customer: Allow to select old customer.
- Upload Image: Upload an image of the guest’s ID or passport.
- Upload file: Upload a file like contract…
4. Additional Notes Section:

5. Actions:

- Save and Print Confirmation: Use this option to save the booking and print the confirmation.
- Save and Print Registration: Save the booking details and print the registration form.
- Save and Checkin: Save the booking details and check in booking
- Save: Use this option if you only need to save the booking without printing.
Notes:
- Ensure that all mandatory fields marked with asterisks (*) are filled out before saving the booking.
- Review all customer and booking information for accuracy before finalizing the reservation.
- Once saved, the booking will be processed.