CREATE GROUP BOOKING
Navigation: Room > Create Reservation Group

This form is used to create new group reservation for guests. Please follow the instructions below to properly fill out the form:
- Register information:

- Booking Code: This is automatically generated and will be used to identify the booking.
- Confirm Code: This is also generated and will serve as the confirmation code for the guest.
- Booking Name: Enter the name of the booking (this could be the guest’s name or the group name).
- Type: Select the reservation type of group booking, including Definite, Tentative, Waiting.
- Arrival Date: Select the arrival date for the guest. The time of arrival should also be selected (e.g., 09:30 AM).
- Departure Date: Select the departure date and time for the guest (e.g., 12:30 PM).
- Number of Days Stay: This is automatically calculated based on the arrival and departure dates.
- Release Date: Optionally enter the release date for the booking if applicable.
- Guest Types: Select the type of guests (e.g., adult, child, or specific group type).
- VIP: Mark if the guest is a VIP.
- No Post Service: By default, it’s turned on. When turning on, user cannot post service to the room (including FnB/Spa post to room).
- Room Charge to Master: This option allows you to charge all the room fee to a master room.
- Note: Add any special notes related to the booking (e.g., special requests, preferences).
2. Billing information

- Rate Code: Choose the applicable rate code for the booking. This will define the price and terms of the room.
- Payment Method: Select the payment method (e.g., credit card, cash, bank transfer) for the booking.
3. Sales information

- Agency: Choose the agency responsible for the booking. This is typically the travel agency or booking platform through which the reservation was made.
- Seller: Select the seller (e.g., the employee or system through which the booking was made).
- Source: Choose the source of the booking (e.g., direct, online, phone, etc.). This helps identify where the booking came from.
- Market Segment: Select the market segment (e.g., corporate, leisure, government, etc.) to categorize the booking.
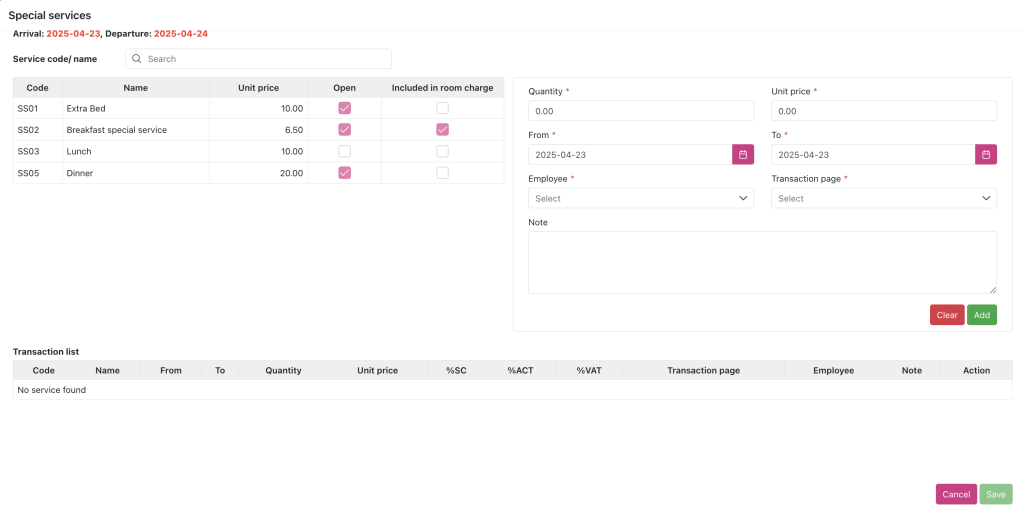
4. Special services: If any special services are required (e.g., additional services, amenities), they can be added here.

- Special service is NOT affected by the No post service button.
- If you add special service on the Group booking screen and do not check “Room charge to master”, after the night audit run, the child bookings belonging to that group booking will automatically generate service revenue. With services configured as “Include in room charge”, they will be generated with room fee after the night audit run -> if the group booking has “Room charge to master” checked, the service revenue with room charge will be displayed together with the room charge revenue line on the Folio screen of the master room booking.
- If there is a child booking that wants to use a separate special service, it will go to the child booking screen to add more.
5. Room type: Filling out the availability and rates for the selected room types, click the Generate button to save and generate child booking accordingly to the inputted quantity và dates.

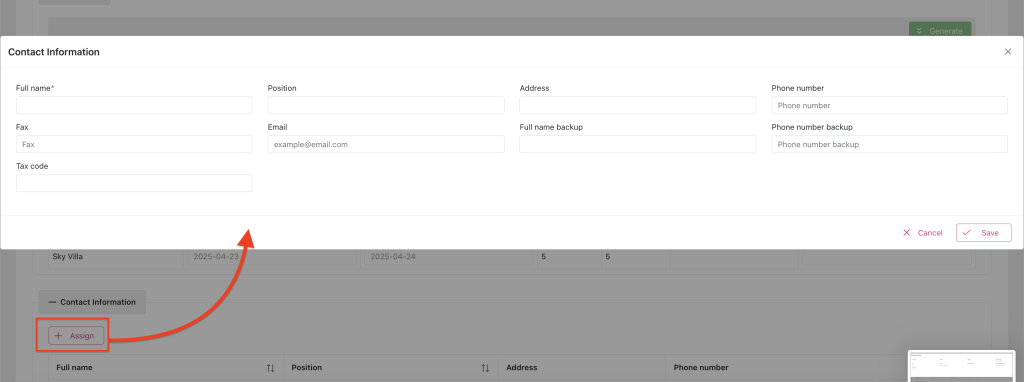
6. Contact information: Allow to add information of the contact person. The name of contact person will be used as guest name for child booking when first generated, click assign to show pop up

7. Guest list: Display the child booking created from Room type section. Note that user can select a child booking to be the master room, master room will be the booking that receives the room charges from other child bookings transferred to it.

8. Actions:

- Save and Print Confirmation: After entering all the information, you can save the booking and print the confirmation.
- Save and Print Registration: Save the booking details and print the registration form.
- Save: If you just need to save the booking details, click the Save button.